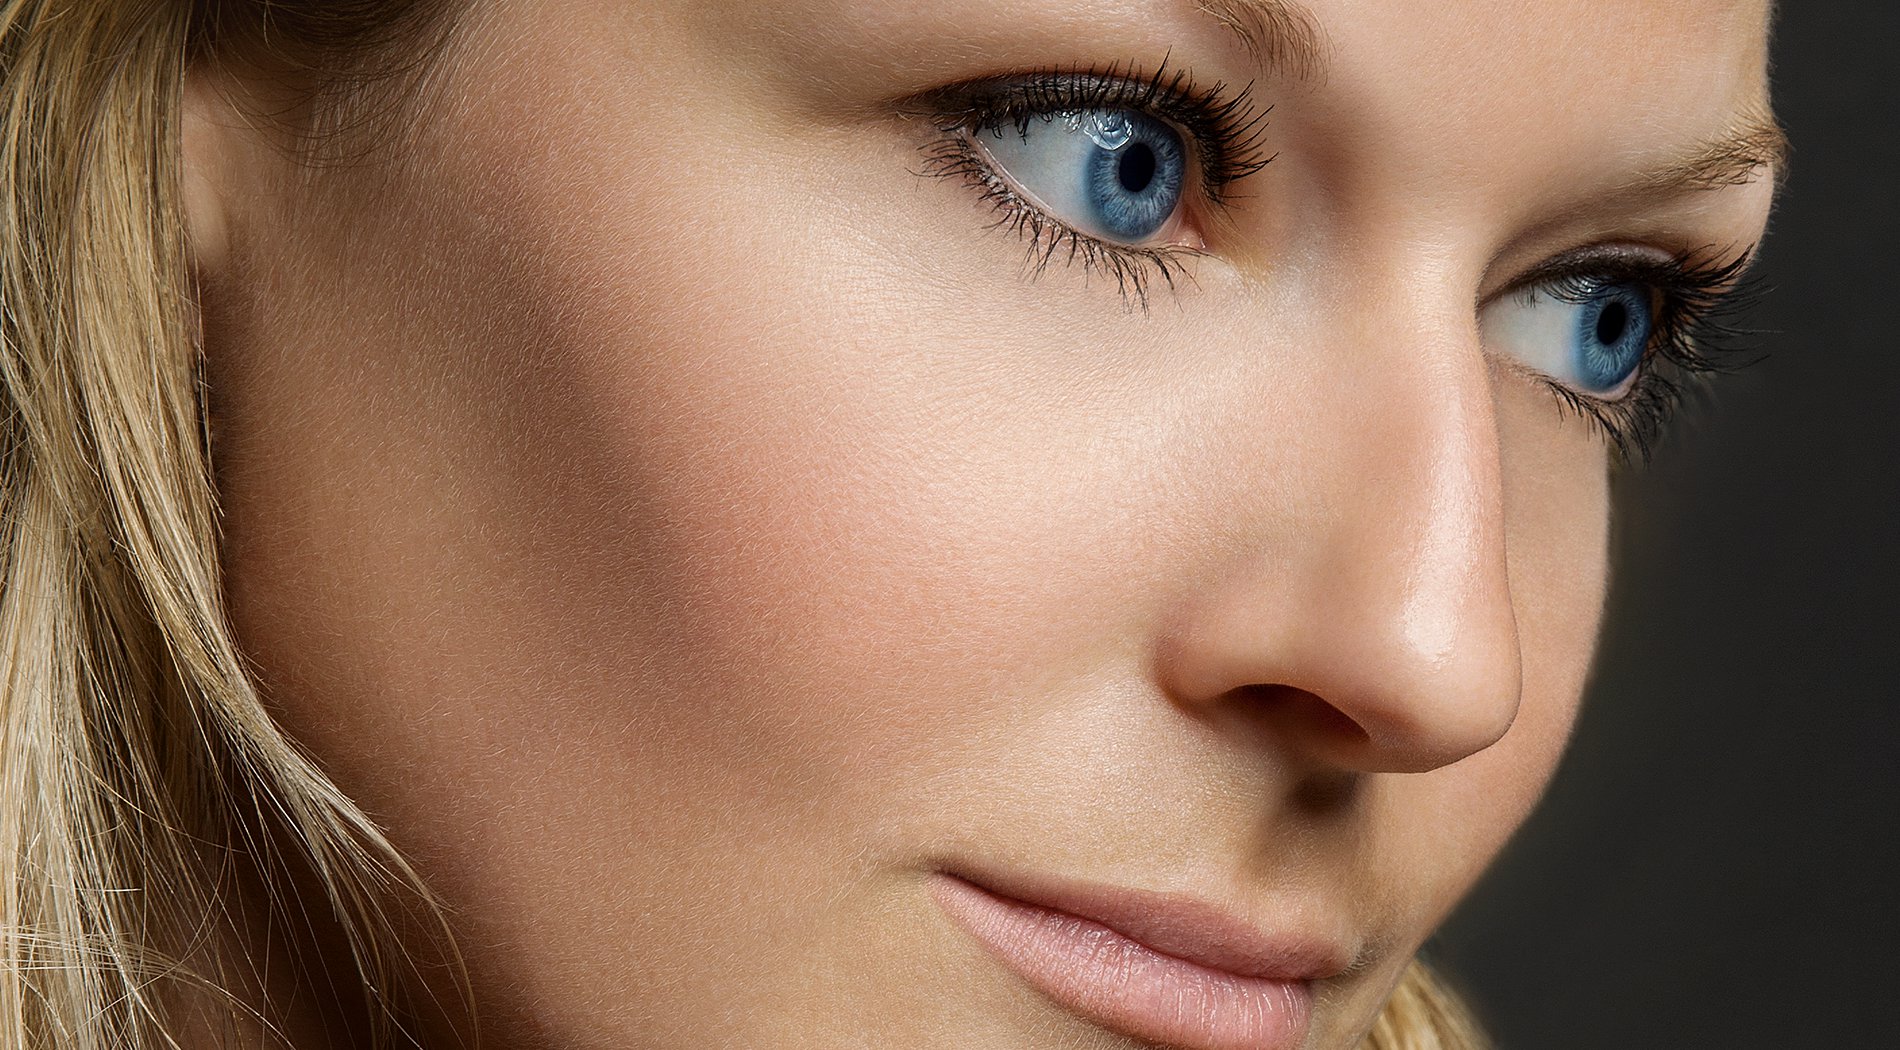
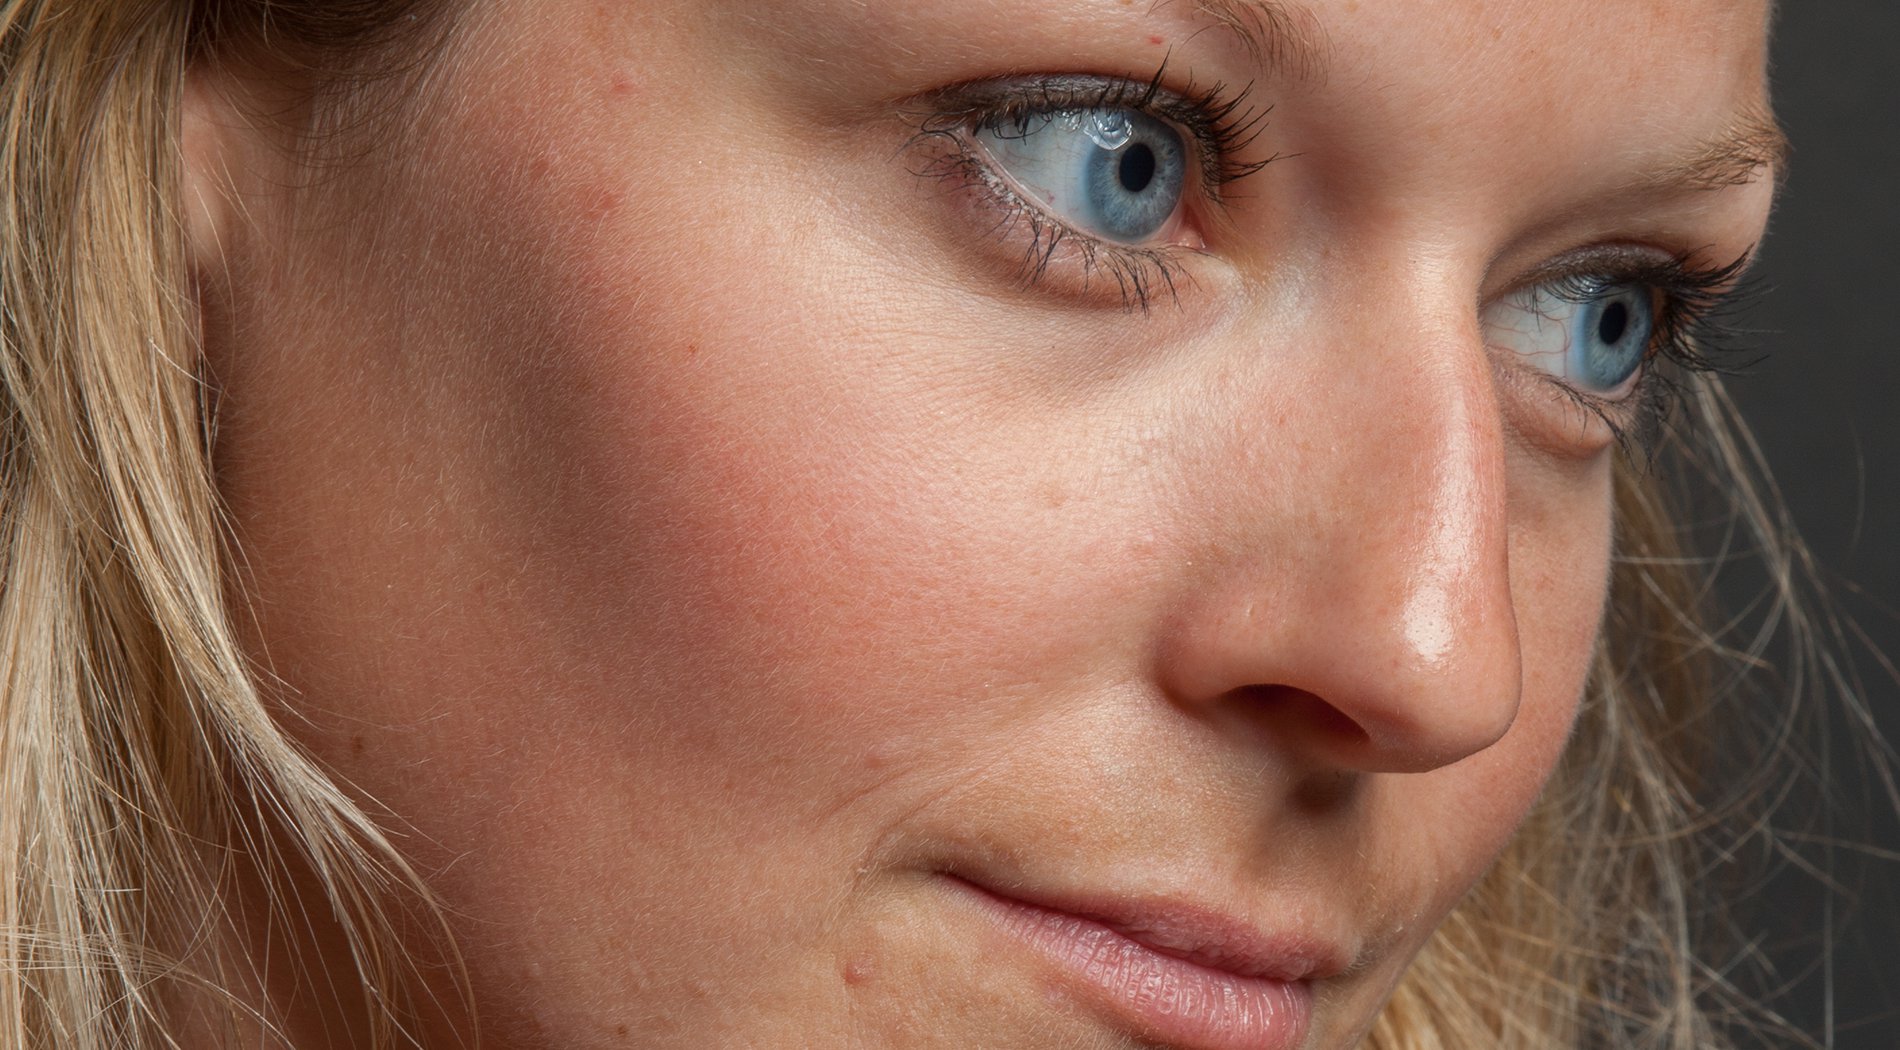
Skin Retouching
In this tutorial you will learn how to perfectly retouch skin with a technique called frequency separation. We show you, how to split the image in a layer with details only and another layer with color only, by using our popularFrequency Separation Photoshop Action.
DomQuichotte will show you different, professional techniques on how to smoothen skin, remove skin blemishes and wrinkles, without destroying the image or making it blurry. Once you’ve figured out, how to retouch skin perfectly, make sure to also improve your hair retouching skills with our Hair Retouching Tutorial.
Download
Subtitles available in English, German, Polish, Italian, Portuguese and Spanish.


how can i download this video
Hi, how can I create the shortcut for Gaussian blur?
Excellent tutorial! Great!
This tutorial helps me a lot. Do you know that after reading this blog my mind just changed? I hope you will post more on this topic. Thanks for sharing with us.
What a post about skin retouching. The tutorials I ever saw. After reading your blog my all problem solved. Many many thanks for sharing with us.
Great tutorials! We always learn something new on the web! thanks
very nice article it is very helpful. great collection and a lot of good inspiration for getting better final results 🙂 Helped me getting even more beautiful shots. Thanks for sharing!
Thanks for sharing. I used your techniques on a photo I thought was beyond hope. Couldn’t have done it without you.
how to use dodge and burn layer ?
Vielen Dank!!!!
Thank you so much…
For large no. of the photos you can try the service which I used.
Visit https://pixelphant.com
Great job!
i cant play the video tutorial…
fantastic tutorial, good job 😀
Thank you for sharing ..wonderful work.
Hello. My mixer brush gives me a contrasty look. what am i doing wrong?
Wow, Totally amazing. The best instructional video for Frequencies yet and the comment on “do not show the model the check list version, unless you want her to feel really ugly” totally cracked me up lol (still laughing). My retouching skills have increased a few times over. Thank you so much
Hi, when I get to the heailing brush part, the heailing brush too doesn’t show any changes (it’s doesn’t do anything on the high frequency layer).
Thanks
same to me =(
Hi, I downloaded the projected files, but when I click to execute it, It just start Photoshop but it doesnt’ happen anything. Could you please explain to me? Thanks
you can open action tab then drag the retouch actin into it
where to do buy the entire retouching video as well as any of the other videos you have posted online?
Chris
Great frequency separation video, I would like to know how to edit with this technique. Let’s say a client wants to have a birthmark on the image that was retouched. Thanks.
sorry but I’ve already found a answer to my previous question
Thanks a lot for your tutorial
it’s really the best I’ve seen!
great tutorial,
I noticed that on the low frequency layer for some parts of the face you use motion blur and for other parts you use gaussian blur. Why is that and what is the difference?
I would like to know all about the 4 check layers. Invert, Black and White, Solarize, and Skin Blemish.
I’m pretty sure you are lowering red channel in a mixer channel for skin blemish, I’m familiar with the solarize layer, then will just anything work to desaturate for the B&W?
same question here.
would really appreciate if you could answer this question.
Thank you!
Hi! Just downloaded today but when I run the simple frequency seperation action it tells me that ‘if’ is not available – is this an important step or can I continue without that, or if it is needed i’ll need help in finding out why mine doesn’t work – I use Photoshop CC version – thank you!
The ‘if” is only available in Photoshop CC (otherwise you need to use the Photoshop CS5 action). Since you’re using Photoshop CC, it should actually work. Make sure your image is in either 8-bit or 16-bit. Let us know, if this helped you.
from Sicily: Sei grande (you are great)
What’s your opinion and experience with tools (Plug In’s as opposed to scripts) like Wow! Tonal Equalizer?
They seem to have multi scale, multi frequency separation.
Do you have any experience with them?
Sorry, we don’t have any experience with that. Actually, as a retoucher, DomQuichotte has his own scripts and his own workflow. So for him, there’s no need for third parties.
AMAZING!! TY
but i have one questione. Why for the skin retouch you use the clone tool on the low level, and not the grey 50% (soft light) with dodging and burning? Which tecnique is better in your opinion?
a friend of mine, send me a link to this tutorial. It’s great! Big thank you for this and for PS actions!! This is awesome.
Sehr schönes Tutorial, klasse erklärt und es ist auch immer super das die PSD Dateien heruntergeladen werden können. Vielen Dank
Ein fettes Danke aus Berlin 😉
i love it,it\´s all
Thank you so much for sharing! Excellent tutorial =)
great! thank you!
love
will you mind creating an action for elements 12 and video for elements 12? I can\´t find apply image option. Thanks.
I think your original image layer in a smart objec, Try to Rasterize it first then try again 😉
WoW !!! Awesome tuts. Really love to watch you guys in action.
http://www.clippingsolutions.com
Thanks for sharing this tutorials with us. You are such a caring person, because "sharing is caring" 🙂
Its the best tutorial I have ever seen on skin retouching.
Thanks so much!!
tutorial videonya downloadnya dimna
tutorial videonya dimana downloadnya
video tutorialnya di mana
Hello Dom.
Thanks so very much for this exelent tutorial. I used frequence separation before but never with check layers. This give my pictures the ultimate kick!!
Vielen Dank aus Schweden. Du bist was Photoshop angeht absolut mein Held!!
// Frank
simple and Best Ever , thx !, I need to understand yet , d&b case
You took the retouching to another level … thank you .. you taught me a lot
cảm Æ¡n ban rất nhiá»Âu.rất bổ ÃÂch.hj vá»Âng bạn có thêm nhiá»Âu taturial má»›i.thankyou
Where z file to download
Sip..
i am a Uganda who loves photography but i didnt study it at any institute friends have been helping me out. am not good at skin retouch. can you kindly send me some tutorials if you can. i will be grateful to improve my editing skills
i can´t open the file in actions. it wont see it as an action file.. i am using photoshop cs6 please help…
Great tutorials!!!
Thanks for the excellent tips. I noticed you started the video using 8 bits but later it lookes like you switched to 16 bits. I have noticed that many retouchers prefer 16 over 8 bits. Does it make a big difference for you? Which one do you prefer?
can you please upload your tutorial videos on youtube also?because your all of your tutorial videos are banned in my country 🙁
can I use it on cs4 please?
This is an amazing site! Very well done. Thank you .
Sehr schön, danach habe ich gesucht…
Saya telah mengikuti kursus privat yg cukup mahal…setelah melihat video retouching dari fx-ray.com ini saya merasa apa yang telah saya dapat tidak ada apa – apanya…terima kasih yang sangat tidak terkira buat fx-ray.
I´ve seen many tutorials like this, but this is the first one where a) the provided actions work seamlessly and b) the tutorial is simply amazing.
Thank you very much for sharing this with the world!
Albert
its very good tutorial.very helpful and interesting.good luck
Sehr tolles Tutorial, vielen Dank
Thanks for the amazing tutorial!! This is really quality stuff! I want to know how long it takes to do this retouching work?
esses tutoriais são esplendidos, parabéns.
Best tutorials I have seen of all time. Great job guys. Thank you very much!
It´s good man!
great
Attractive tutorial
it\´s great
ET8175535
quero tuto disso
como faço para mudar par portugues a video
Stunning and helpful tuttorial. Thank you in advanced for your effort and sharing attitude.
Thank you 🙂 but I can\´t seem to use them in photoshop cs6 🙁 It doesn\´t let me press the \´play\´ button to load the preset
Thank you very much. You have hgh quality stuff and you giv it all by free. Thank you again….
Awesome Tut,.. but does not work for me :/ I can\´t edit on the high frequency layer :/
I am so excited to start using the tutorials. It was mentioned on Creative Live!
Very GOOD !~!!
O MELHOR site de tutoriais gratuitos do mundo…
Photograph
This is a great site! I too was referred by the Lindsay Adler class!
I was watching Lindsay Adler on CreativeLive and she mentioned you (in glowing terms), and I came right here. Thanks for the downloads and tutorials!
I love your website and tutorials! Thank you so much! I work extra hard to improve my retouching
super
Logiciel
Nice work, thank !
very good~!!!
I am so in love with your website and I am learning a lot. Thank you and this tutorial is amazing.
I already knew Frequency Separation but your approach seems to be more modern and up-2-date. The use of Motion blur is also a great help for me!
Thanks.
This is amazing! Thanks for creating such an excellent website and tutorial.Brilliant.
Thanks for this tutorial and also for the actions. You guys are amazing. learn\´t a lot already.
Great tutorial.. thanks
Excellent contribution. I would ask a special favor, I could get the subtitles in the video would be Spanish (srt file.) Very helpful for my learning. Best Regards
and the actions for the cs6 ?
is so wonderfull tutor and so helpfull,
thanks for sharing .. you so nice guy.
probably the most comprehensive freq separation tutorial available on the internet. Very very good!
Congrats David Huang for share CC in portuguese.
Awsome 5/5 STAR. Thankyou for sharing ! :*
Türkçe altyazı isterim.
Muito legal legendado em português, parabéns ao David Huang e ao Fx-Ray team!!!
Thx for sharing. Perfecto
很好
She\´s beautiful
thanks > perfect!
Thanks for this! It has helped so much with my editing!
just awesome !!!!!!!
thx for the PS actions !
jcpower
What did u do with her eyes??
Goodbye D&B, welcome FS. 🙂 Nice tut and to the point. Tnx.
thanks for sharing
you are amazing. Thank you for sharing your knowledge with the world and making it a better place.
Awesome tutorial.
But please explain how you improved the look of the eyes and the eye-lashes.
Thanks in advance.
Awsome. Thank you for sharing !
perfect …
Good job!
fantastic … congratulations …
hcmanx
awesome tutorials..thnx for sharing…….
Heard about fx-ray.com a few days ago.
The Skin Retouching Guide is just really smart!
sss
sss
sss
sss
good
it´beautiful
great
nice man!
amazing ! Great work and good arguments and guides to who wants to do some of this 😉
nice buddy…………many more ideas I got……….specialy your free image I down it,,,,,,,,,,,,,,,, thanks.nice job.keep it
thank you!! can i download this for cs 6?
All your tutorials are great !!! you are Awesome!! and Merci beaucoup Don Quichotte.
Amazing tutorial! I´ve understood all the things you\´ve explained, and I have also learned a bit of English 😀 (I\´m Italian, I think you have noticed that looking my comment). Love all your tutorials, but I think that this is my favourite 😀
good!
This is really HELPFULL and AWESOME, i usually retouch with another tipe of frecuency separation, but this one adds more details and you can actually separate color of textures.
Love it.
Can you make a Dodge and Burn tutorial? Thank you so much, awesome work!!
send me tutorials
Nice tutorials. keep them coming and more power to the group responsible for making it happen and made available for everyon
i´m just give your idea if u make tutorial u can give subtitle. because no one can speak english. like me, im just can speak indonesia
perfect
Please upload to YouTube so we can use it.
Einfach genial!
Excelente vÃÂdeo… Siempre ayudando a aumentar la creatividad!
Thank you for your tutorial.
Thank you for this good design
ali
everytime I have to go to the FB page to unlike and then click here on the "like" button again and again and again I get the message I have to like the page here.
Sehr schön gemacht. Mich würde nur interessieren, an welchen Stellen nutzt du den Bereichsreperatur Pinsel und wo den Stempel. Ich hab es mal nach gemacht und komme fast immer mit dem normalen Kopierstempel zu besseren Ergebnissen. Beim BRPinsel wird es oft zu weich und Details gehen eher verloren. Falsche Einstellungen ??
awesome and thanks!!!
I love your tutorial!
I\´m waiting for the part 2 about color, eyes etc!
Super Tutorial! Vielen Dank! Weiter so 🙂
Good
perfect!
Nice tutorial! Thank you!
Aamazing!
This my waiting…
I love your Tutoria 😀
WHAT I LOOKING FOR ……. GREAT!
Good morning Sir, am Emmanuel Eze from PH an up coming photography i love you work, but i have a small challenge with money to get you actions, please can you help me
Our tutorials and actions are all free.